In software development, certain software were not designed to run on the ARM-based Apple Silicon. Thankfully, there are workarounds to install and run the Intel version of these applications. Like for the rest of this blog, this post aims to serve as a personal notebook and also for sharing this knowledge.
When I started looking into solutions to my Macbook Pro M1 challenges, a huge chunk was solved when I had read Ekaterina Nikonova’s excellent blog post on Python virtual environments with pyenv on Apple Silicon.
This blog post is heavily influenced by her approach of setting up the app and app86 versions for apps which might need both native and emulated treatment.
Rosetta 2
To be able to emulate Intel on M1 macs, first install Rosetta 2:
/usr/sbin/softwareupdate --install-rosettaThis enables the ability to run terminal commands using the Rosetta 2 Intel emulation:
arch -x86_64 <command>You can read more in Apple’s official docs.
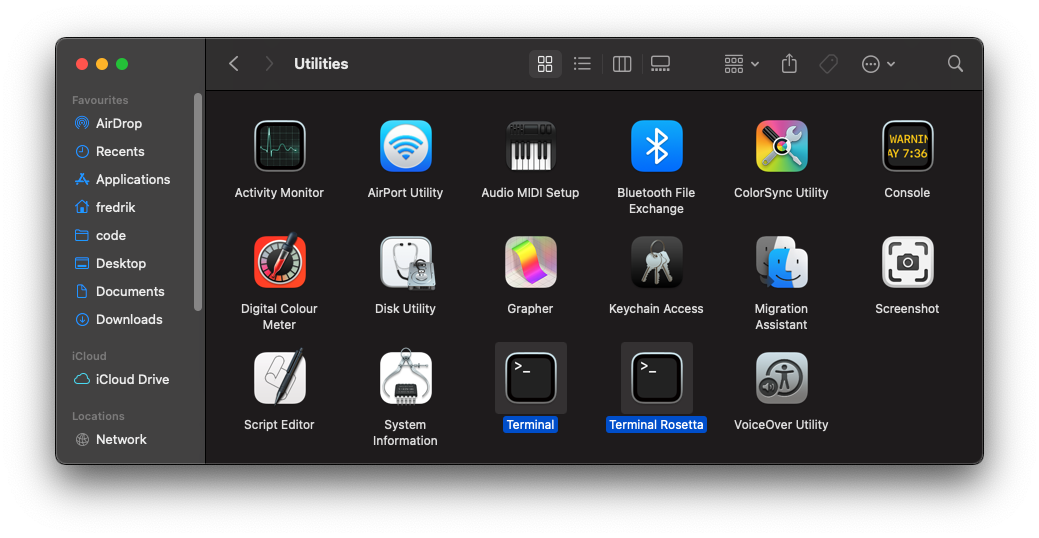
Two terminals; one native and one for Intel emulation
I have duplicated my Terminal application of choice (Cmd+d) and renamed the duplicate “Terminal Rosetta”. Then I’ve ticked the “Open using Rosetta” checkbox after having hit Cmd+i on its icon. This gives me one Terminal to run for native applications and one for Intel emulation.
This is not how I usually work, as I prefer to set up commands which can run in the native terminal and perform emulation. But I figured, I’d mention this anyways.
Note: all commands in this guide has been executed in the default and native Terminal app, unless stated otherwise.
Installing two variants of certain software
This describes how to install the native app and the Intel app86 counterpart of certain software. As an example, I have brew and brew86 set up, just like described in
Ekaterina’s
post.
This can be achieved by creating shell aliases but also small shell “shim” scripts for the Intel variants. I prefer the shell script shim approach, and I have mine publicly available in the shell/bin location of my dotfiles.
If you go for the shell script shim approach, make sure you make your shims executable and available on $PATH.
Feel free to copy and/or contribute with your improvements!
Homebrew
Begin by installing native and Intel version of Homebrew:
# Install Homebrew for Apple Silicon
/bin/bash -c "$(curl -fsSL https://raw.githubusercontent.com/Homebrew/install/master/install.sh)"

# Install Homebrew for Intel
arch -x86_64 /bin/bash -c "$(curl -fsSL https://raw.githubusercontent.com/Homebrew/install/master/install.sh)"
After completing the installation, the brew command will be available which will install native Apple Silicon software. We can create a new brew86 command which will install Rosetta 2-emulated Intel-compiled software. You might be able create an alias:
alias brew86='arch -x86_64 /usr/local/bin/brew'But, like I mentioned previously, I prefer the shim approach. See my brew86 shim
here.
Then I install all software using brew for Apple Silicon. But in case of issues I can fall back to the Intel version using brew86.
Python (pyenv)
I prefer managing Python versions via pyenv. Because some packages won’t install on Apple Silicon, I need to be able to install the Intel-verison of Python for some projects.
Pyenv itself can be installed for Apple Silicon only, but we’ll need pyenv-alias to accomodate for Intel versions of Python interpreter installations:
curl -s -S -L https://raw.githubusercontent.com/pyenv/pyenv-installer/master/bin/pyenv-installer | bash
git clone https://github.com/s1341/pyenv-alias.git ~/.pyenv/plugins/pyenv-alias
At the time of writing this, and ccording to the installation, one must add a couple of things to their ~/.bashrc, ~/.zshrc or similar, so to make the pyenv command fly and have it intercept the python command:
export PYENV_ROOT="$HOME/.pyenv"
export PATH="$PYENV_ROOT/bin:$PATH"

eval "$(pyenv init --path)"
eval "$(pyenv virtualenv-init -)"
After having completed the pyenv installation, we can go ahead and install Python for Apple Silicon first:
brew install openssl readline sqlite3 xz zlib # required to build python
pyenv install 3.10.1
Then we create another alias (or
shim) to make pyenv86 available:
alias pyenv86='CFLAGS="-I$(brew86 --prefix openssl)/include" LDFLAGS="-L$(brew86 --prefix openssl)/lib" arch -x86_64 pyenv'Then let’s install the same Python version, but for Intel. To prevent a clash with the already intalled 3.10.1, we’ll install it using pyenv-alias as 3.10.1_x86:
brew86 install openssl readline sqlite3 xz zlib # required to build python
VERSION_ALIAS="3.10.1_x86" pyenv86 install 3.10.1
You can use this crude check to verify that each respective version was installed using the intended architecture:
$ ~/.pyenv/versions/3.10.1/bin/python -c "import platform; print(platform.processor())"
arm

$ ~/.pyenv/versions/3.10.1_x86/bin/python -c "import platform; print(platform.processor())"
i386
You can now use pyenv as you usually do with pyenv local or pyenv global. There’s only need for pyenv86 when installing new versions. Examples:
cd my_arm_project
pyenv local 3.10.0
python -m venv .venv
source .venv/bin/activate

# or for Intel...
cd my_intel_project
pyenv local 3.10.0_x86
python -m venv .venv
source .venv/bin/activate
I usually create “x86” virtual environments, to be used in vscode, for some projects which needs to install software that has no ARM-release yet. This has worked out great so far.
Node (nvm, npm)
First, let’s install nvm. I prefer to install via brew, but you can also use the install script, described in the official docs.
brew install nvmThen add sourcing and environment variables to your .bashrc, .zshrc or similar:
if [ "$(uname -m)" = "arm64" ]; then
    export NVM_DIR="$HOME/.nvm"
elif [ "$(uname -m)" = "x86_64" ]; then
    export NVM_DIR="$HOME/.nvm_x86"
fi

[ -s "/opt/homebrew/opt/nvm/nvm.sh" ] && \. "/opt/homebrew/opt/nvm/nvm.sh"  # This loads nvm
[ -s "/opt/homebrew/opt/nvm/etc/bash_completion.d/nvm" ] && \. "/opt/homebrew/opt/nvm/etc/bash_completion.d/nvm"  # This loads nvm bash_completion
You can now use all nvm/node/npm commands as expected for native Apple Silicon. If you hit a certain project/package where there is no ARM support, you can drop to a Rosetta-emulated shell, and run all commands from there instead, e.g.:
arch -x86_64 /bin/zsh
cd problematic-project
nvm use
npm install
You can always check if you are in native terminal or in the emulated one using the arch command. You can also check with nvm which, which Node version is active.
Detecting running under Apple Silicon (or ARM in general)
You can check in your shell or in e.g. Python which architecture is currently in use:
| Command | macOS Apple Silicon | macOS Intel (Rosetta 2) | Linux ARM | Linux Intel |
|---|---|---|---|---|
uname -m | arm64 | x86_64 | aarch64 | x86_64 |
uname -p | arm | i386 | aarch64 | x86_64 |
arch | arm64 | i386 | N/A | N/A |
python3 -c "import platform; print(platform.processor())" | arm | i386 | aarch64 | x86_64 |
node -p process.arch | arm64 | x64 | ? | ? |
Visual Studio Code terminals
This is my set up in vscode, so I can quickly create terminal tabs for either a native or Rosetta 2 experience:
{
  "terminal.integrated.profiles.osx": {
    "zsh": {
      "path": "zsh",
      "color": "terminal.ansiGreen"
    },
    "zsh-rosetta": {
      "path": "arch",
      "color": "terminal.ansiRed",
      "args": ["-x86_64", "zsh"]
    }
  },
  "terminal.integrated.defaultProfile.osx": "zsh"
}
Docker containers
I’ve come across a few cases where I e.g. haven’t been able to build a Docker image which was not compiled for ARM. Thankfully, there are workarounds for this too.
Build from source
A pre-built binary or wheel for ARM may not exist when installing via e.g. npm or pip. You can try to install all the necessary build tools and instead try having the software built from source. This will result in staying native without any emulation.
As an example, this will fail as of writing this blog post on my M1 mac:
FROM node:14-buster-slim

RUN npm install sqlite3
…and this will work fine, as sqlite3 will build from source:
FROM node:14-buster-slim

# Install sqlite3 and build tools, so to build from source during
# "npm install", since no precompiled build for ARM is yet available
RUN if [ "$(uname -m)" = "aarch64" ]; then \
    apt-get update && apt-get install -y \
        apt-transport-https ca-certificates sqlite3 \
        build-essential python-dev python3-dev \
        ; \
    fi

RUN npm install sqlite3
Define the platform
If the software in question simply was not written to be compiled on ARM at all, you can instead leverage Docker’s --platform argument, which will build the container as if you were on a Linux system:
docker build --platform linux/amd64 ...Please note that the --platform argument is also available for docker run.
The platform key can also be added to a service in docker compose:
version: "3"
services:
  myapp:
    build: .
    image: myapp
    platform: linux/amd64
Target multiple platforms with buildx
Using Docker’s buildx, you can build images which target multiple platforms.