
The new Windows Terminal (codenamed “Cascadia”) was revealed at this year’s Microsoft Build conference and quickly received a lot of attention, as it addresses the decades-old terminal experience in Windows.
This is me jotting down notes on how to get up and running with the new Terminal before it gets officially released in the Windows store, using Visual Studio 2019. This is all possible thanks to the fact that Microsoft is open sourcing the new Terminal!
Update 2019-06-22The new Windows Terminal (pre-release) can now be downloaded from the Windows Store and will be updated automatically as it reaches v1.0 and beyond. Read more about the release here. If you build the terminal yourself, this will run side-by-side the Store-installed version.
Requirements
You will need Windows 10, version “1903”. Get this by joining and enabling the Insiders Program. Set the “Release Preview” option and reboot. Then check for updates until you see the “1903” version downloading and installing.
You will also have to enable “Developer mode” in Windows.
Installation steps
Install Chocolatey using the instructions on their website. Then open a new and elevated Powershell console (e.g. right-click Powershell and choose “Run as administrator”).
Let’s install git, unless you already have it:
choco install -y gitThen install Visual Studio 2019 Community Edition, unless you already have Visual Studio 2019 installed:
choco install -y -v visualstudio2019communityA number of workloads and components are required to build. Get them by using the Visual Studio Installer GUI or via this (administrative Powershell) command:
& "C:\Program Files (x86)\Microsoft Visual Studio\Installer\vs_installershell.exe" \
    modify \
    --installPath "C:\Program Files (x86)\Microsoft Visual Studio\2019\Community" \
    --passive --norestart \
    --add Microsoft.VisualStudio.Workload.NativeDesktop \
    --add Microsoft.VisualStudio.Workload.Universal \
    --add Microsoft.VisualStudio.Component.Windows10SDK.18362 \
    --add Microsoft.VisualStudio.ComponentGroup.UWP.Support \
    --add Microsoft.Component.VC.Runtime.OSSupport \
    --add Microsoft.VisualStudio.Component.VC.v141.x86.x64 \
    --add Microsoft.VisualStudio.ComponentGroup.UWP.VC.v141 \
    --add Microsoft.VisualStudio.Component.VC.v141.ATL \
    --add Microsoft.VisualStudio.Component.VC.v141.MFC
NOTE: If you already have VS2019 installed, you may have to double-check the paths used above.
In case the build requirements change in the future, here is a list of the workload/component IDs and here are the installer arguments.
Get the source code
In a directory of your choice:
git clone --recurse-submodules https://github.com/microsoft/Terminal.gitBuild and deploy the terminal from VS2019
So, we can build, deploy and run the terminal from within Visual Studio (since VS2019 adds its own developer certificate).
Launch VS2019 and open the OpenConsole.sln solution inside the cloned git “Terminal” folder. If you are prompted by Windows, enable “Developer mode”.
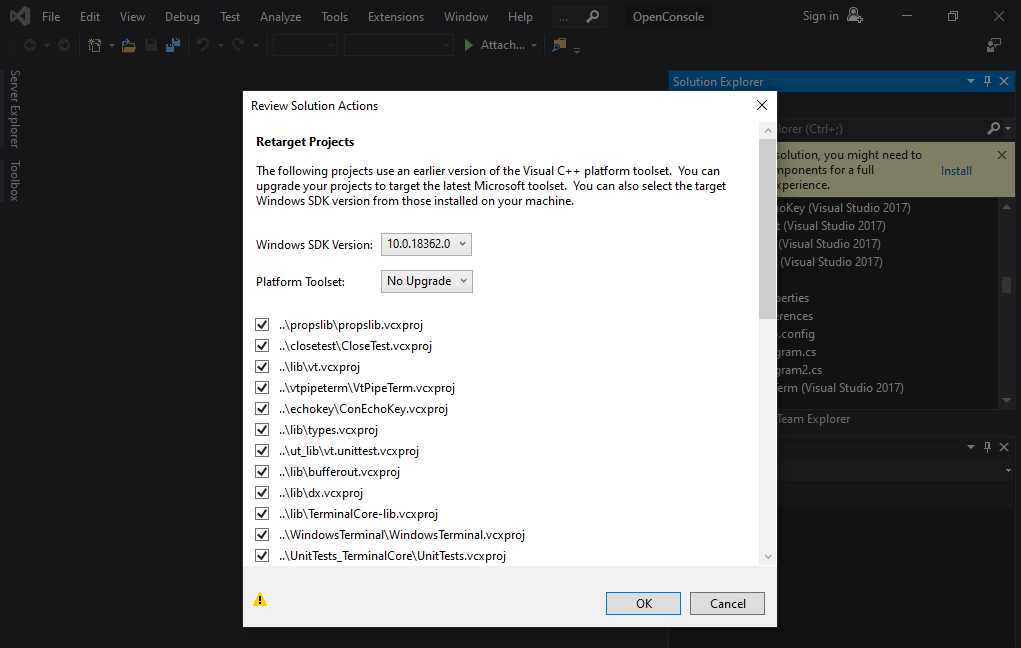
You will be prompted to upgrade the environment. In this dialog, choose to use Windows 10 SDK 10.0.18362.0, do not upgrade the Platform Toolset to v142 (meaning; keep using v141) and click “OK”, leaving all the remaining boxes ticked.
When the solution has been fully loaded, choose the following configuration dropdown menu values “Release”, “x64”, “CascadiaPackage” and click the “Local Machine” button. This will build, deploy and launch the terminal.

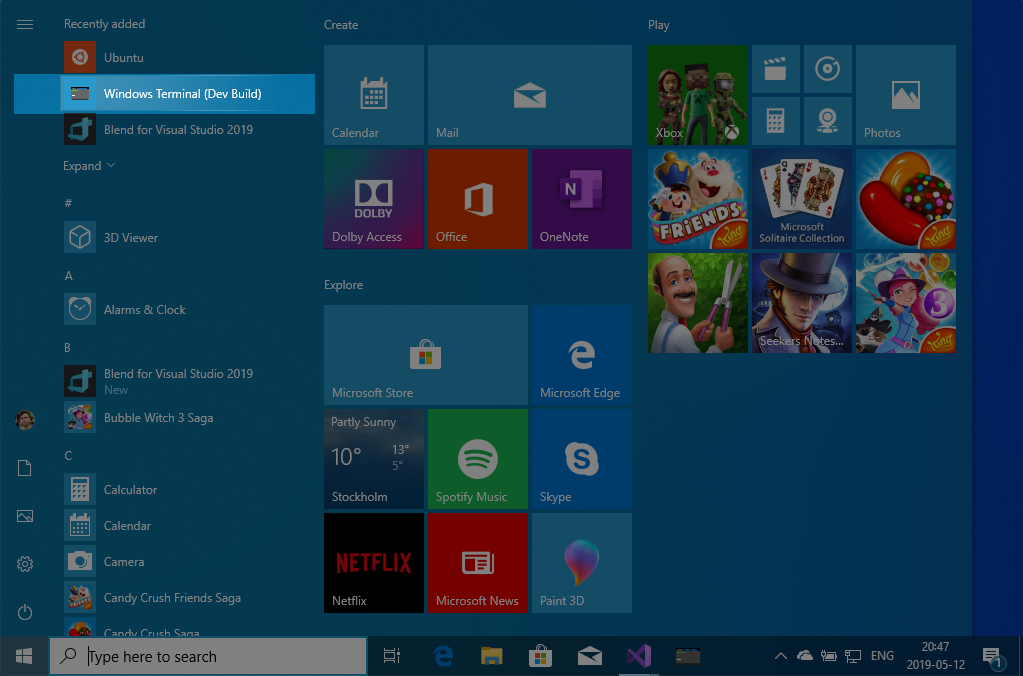
You will now find the “Windows Terminal (Dev Build)” in the Windows Start menu and you don’t have to launch this from within VS2019 again.
Build on command line
Note: Without a certificate, you won’t be able to install the built .msix package.
Configure and build:
cd Terminal
dep\nuget\nuget.exe restore OpenConsole.sln
tools\razzle.cmd
tools\bcz.cmd rel
Fun fact: Apparently, “razzle” and “bcz” are terms from within Microsoft, where “razzle” refers to a script which sets up your environment and “bcz” builds the project (with a clean prior to build).
For more details on these commands, see the tools/README.md file.
This will produce CascadiaPackage_0.0.1.0_x64.msix inside of src\cascadia\CascadiaPackage\AppPackages\ ....
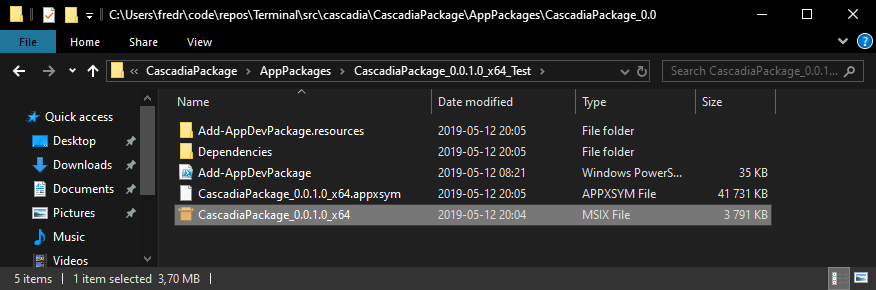
However, you cannot install it, as it does not contain a valid certificate.
Configure Terminal
Once Terminal is running, hit ctrl+t to create a new tab. The menu icon will appear and you can enter the “Settings”, which will launch a profiles.json file.
Here is how you can add WSL to the menu:
- Create a new session in
profiles, with content copied fromprofiles/cmd - Give it a new guid
- Give it a new name, such as “WSL”
- Specify its commandline to
wsl.exe
{
    "guid": "{09dc5eef-6840-4050-ae69-21e55e6a2e62}",
    "name": "WSL",
    "colorscheme": "Campbell",
    "historySize": 9001,
    "snapOnInput": true,
    "cursorColor": "#FFFFFF",
    "cursorShape": "bar",
    "commandline": "wsl.exe",
    "fontFace": "Consolas",
    "fontSize": 12,
    "acrylicOpacity": 0.75,
    "useAcrylic": true,
    "closeOnExit": false,
    "padding": "0, 0, 0, 0"
}