This is how I would deal with the linear workflow (including non-linear preview) between Maya 2010 and Nuke 6.0v6.
If you are new to linear workflows and do not really understand what this is for, please read the Linear Workflow, part 1 article before continuing.
Default render, no gamma correction
Make sure mental ray is loaded by enabling the mrtomaya.mll plugin in the plug-in manager. Put your favourite model in the scene, create a camera and some lights. Hit render.
I have used a Bobby Car model in this example and I applied a standard mia_material_x to it.
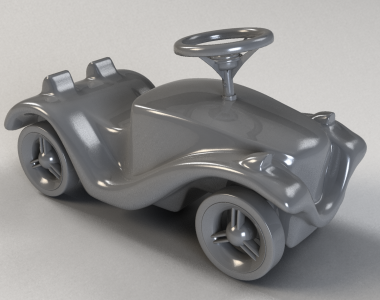
The image you just rendered was created in linear space and is now presented on screen without a gamma 2.2 correction, thus would show correctly on a display device with gamma 1.0 but does not display correctly on a usual workstation display or laptop screen, which is usually using a gamma of 2.2 (or sRGB, which is approximately gamma 2.2).
If you were to start lighting and shading the objects in the scene (lacking gamma correction for your display device) the render will simply put come out wrong; in a way that was not intended. In order to achieve a certain shade of color or a certain level of light you would have to over crank values that could cause physical light simulation not to work properly.
Well, since there is no button in the render view that can toggle gamma correction between 1.0 and 2.2 (anyone at Autodesk reading this?), we will simply have to perform a gamma correction ourselves, only to be correcting while we light and shade the scene. Whenever we are done we will need to remove the gamma correction before rendering out the files to disk, as keeping the images in a linear data format throughout the graphics pipeline is crucial (performing linear math on non-linear data would lead to unexpected results).
Gamma correction for preview render while shading and lighting
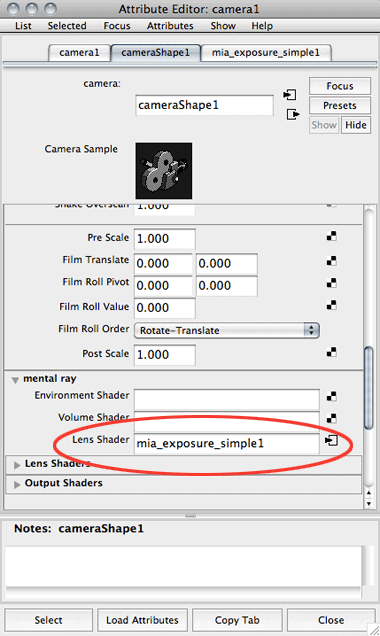
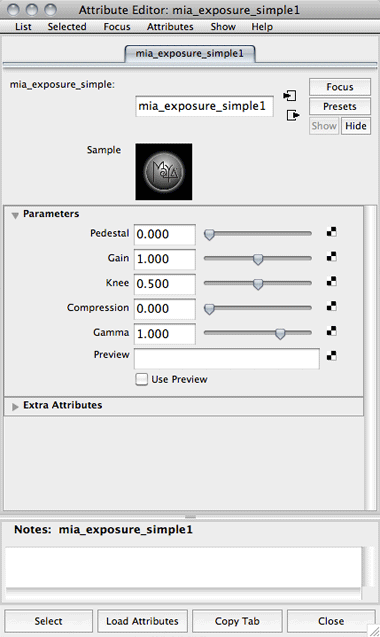
In this example, I will use the mia_simple_exposure lens shader (which is a simple tone mapping shader) for gamma correction. Map this shader onto the “lensh shader” attribute in the camera’s attribute editor under the “mental ray” section. There are five values here to review.

The Pedestal parameter value is added to the color and allows you to tweak the black level. A positive value adds some light so even the darkest black becomes slightly gray. A negative value subtracts some light and lets you create more contrasting effects. We do not want to mess with this value at this time, so leave it at 0.
Gain controls the overall brightness. This is the main point where the high dynamic range values are converted to low dynamic range values. In our case, we do not want to convert any values and we will leave this value at 1.
Then we have the knee and the compression values. All values above the knee value will be compressed. This means that the values that have been compressed will be “squashed”; brought down from being completely blown out into becoming visible. In this example, I will turn off the compression by setting it to 0. Since there will be no compression, it does not matter what the knee value is so we might just leave it as is.
The gamma setting will correct the color for the output device and this is where things are getting really interesting. We should set this to 1 when rendering out our final image, but for now leave it at 2.2.
Re-render with gamma correction
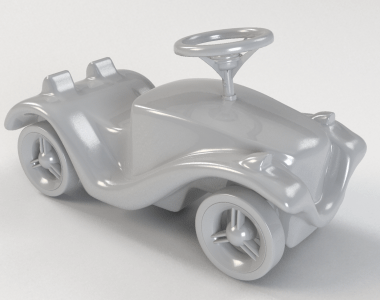
Now when we re-render our scene, it is apparent that we see a brighter image but when looking closer the whole behavior of the lighting is different. Light is spread more evenly throughout the scene, shadows are less contrasty and highlights are not as blown out. What happened?
This is actually how your image is meant to be perceived by the human eye via a computer screen of gamma 2.2. In the past, you have been watching your rendered and linear images without a gamma correction for the 2.2 gamma. Now, when you have the lens shader applied and have it correcting at gamma 2.2 you can finally see what is really happening in your scene.
Please note that this method is in no way related to how a LUT (lookup table) would work. When working with a LUT, typically the data is processed in linear space and then stored to disk in linear data. Not until the linear data is visualized on a display device, the gamma correction kicks in with the help of a LUT, simply transforming the linear data image according to the LUT. In our case, the gamma correction is baked into the image and if we were to render it out to disk we would break the linearity in our pipeline. But let us move on…
Now we can light the scene and shade the objects (in my case the Bobby Car) as the image will render with a gamma correction that is suited for computer display devices. The physical light simulation is returning expected results.
Verify texture files
If you have any texture files in your scene and they already have the 2.2 gamma correction curve baked into them, you need to remove this. Note that most digital cameras apply the 2.2 gamma correction to their images.
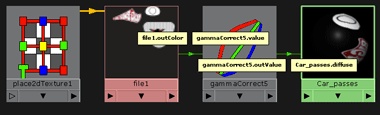
Removing the gamma correction of 2.2 can be done by using the a “Gamma Correct” node. Make a connection from your texture file’s outColor to the “Gamma Correction” node’s value. Then connect the “Gamma Correct” node’s outValue to the shader’s diffuse.
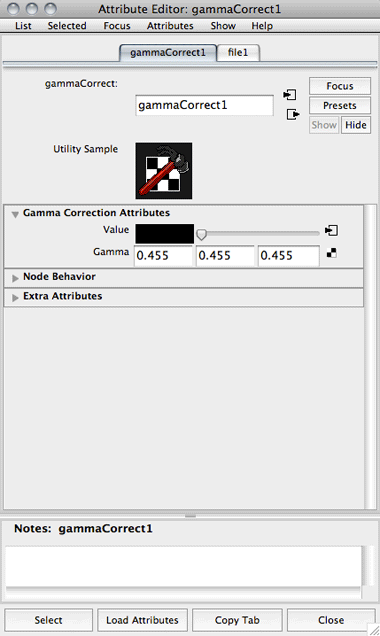
The gamma correction for sRGB devices (with a gamma of approximately 2.2) is ½.2 = 0.4545. If your texture files are gamma corrected for gamma 2.2, put 0.455 into the Gamma attribute text boxes.
Thanks to
Matt Estela, who pointed out to me that procedural textures and colors within Maya are presented to the user via the user interface in gamma 2.2 colorspace (but are physically linear “under the hood”) and should be gamma corrected in order to appear the same color in the render when rendering using a linear workflow – but this only applies for color attributes and not if they are used for non-color properties such as bump, specular strength, reflectivity etc. A simple test to make sure you get it right: Set a single color on a lambert, and render it in a linear workflow. The colour you select for the material swatch will not match the render view. If you connect the diffuse color to a Gamma Correction node, set its gamma to 0.455 and set its color swatch to the original colour, it will match up.
You should not apply the Gamma Correction node for HDR and OpenEXR files in your shader network as they are, by specification, linear space images. It could also come in handy to know that you can use the “Multiply Divide” node for gamma correction operations rather than the “Gamma Correction” node.
Rendering the linear data to disk
When you are ready to render out the image to disk, go back to the “mia_exposure_simple” lens shader settings and change the gamma value from 2.2 to 1. The reason for this is that we want to render out image in linear data – which means using a gamma correction of 1 – and keep the data handling throughout the process linear.
Please note that you should not remove the “Gamma Correction” nodes that are attached to textures in your shader network.
Output images in 32-bit float
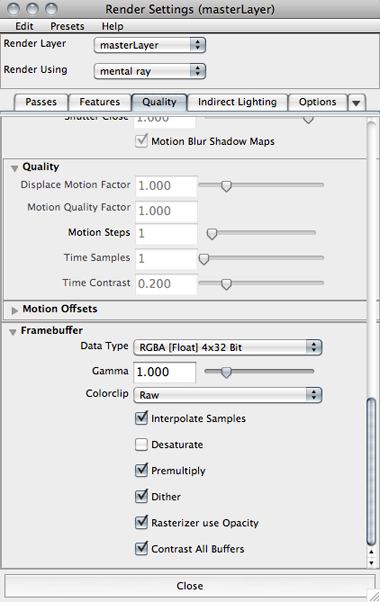
In the framebuffer settings (at the bottom of the “Quality” tab in the render globals), the default data type setting is “RGBA [Byte] 4x8 Bit”. This means we have four channels of 8-bit data in the image. This is okay if you intend to output preview JPEGs of your render but we want far more control later on during compositing/color correction and need to change this to RGBA [Float] 4x32 Bit.
Moving on, the gamma needs to be set to 1, which is also the default value.
Make sure that the Colorclip value is set to raw. A good thing to know here is that this automatically turns Premultiply on (which is on by default anyways).
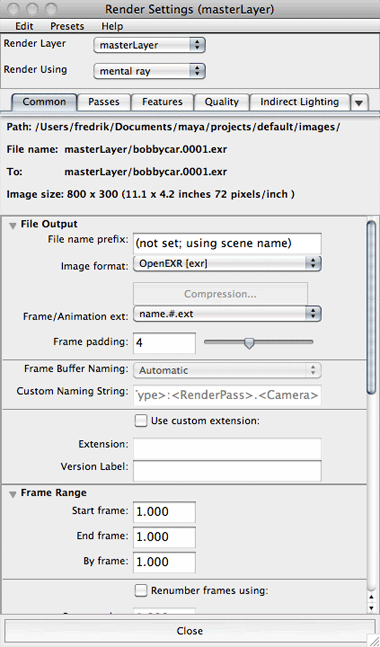
Let us pick the OpenEXR file format for rendering.
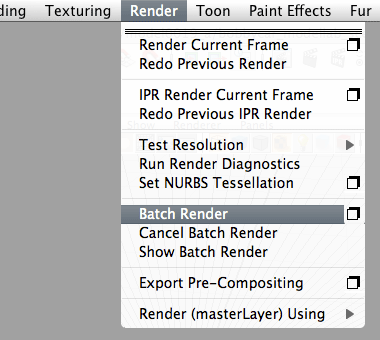
It is important to remember that you cannot save a 32-bit float render from the render view window. You will have to render out the image using the batch renderer.
Bring the linear data into Nuke
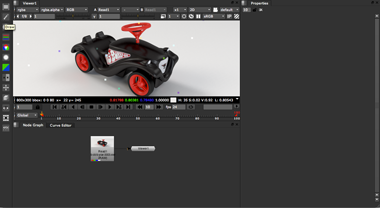
For this tutorial, I am using Nuke 6.0v6 Personal Learning Edition (which is why there are artifacts in the render).
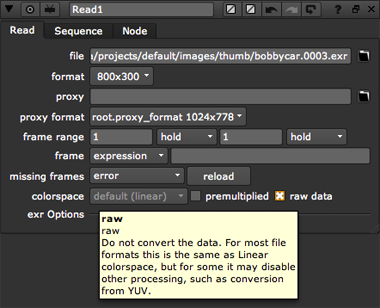
Drag and drop the image file into Nuke. Open up the control panel for the Read node and make sure “colorspace” is set to linear, as the image from Maya was rendered in linear data. You should not have to tick the “raw” checkbox but it will not hurt to do so anyways.
Perform operations on the image
You can now perform any operations on the image and use it in a composit without worrying about gamma corrections. Nuke is by default assuming you are using an sRGB (approximately gamma 2.2) display device and will gamma correct what you see on your screen for sRGB but under the hood it is processing all images in linear space.
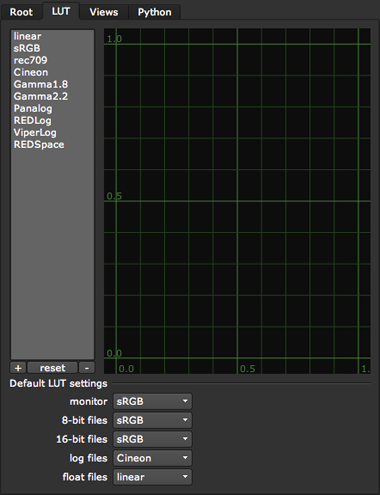
In case you are not viewing the images on an sRGB display device, you can change the gamma correction in the project settings under the “LUT” (lookup table) tab. Here you can see the different LUTs that are bundled with Nuke.
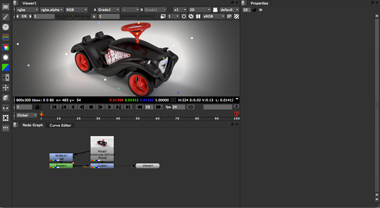
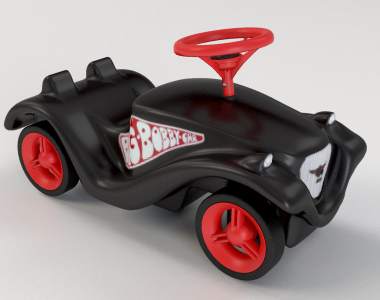
Let us just do a simple vignette using a masked grade node, without any particular settings, just in order to manipulate the image before rendering the final image out.
Render the final image
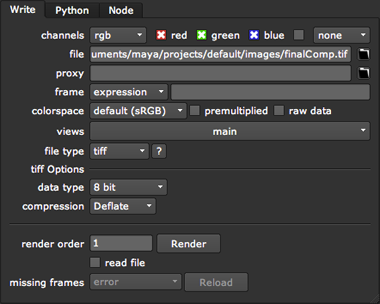
In order to render the final image, create a write node. Now choose your final delivery format. I am just going to use TIF with 8-bit color depth. Here, pay attention to the “colorspace” setting, which decides which gamma correction will be baked into the image file. In my case, I know I am just going to view the image on sRGB compatible computer display screens so I am going with the default (sRGB) setting. If you were delivering a video for broadcasting in an uncompressed quicktime file format you might want to choose “rec709” here. For feature film work, perhaps you need to deliver DPX files in “Cineon” color space or even a custom color space which you received from the film lab.
Always check with the person you are delivering the final images to before deciding the options above and rendering out the final images from the compositing package.