Utilizing the Z channel (depth information) of Maya’s IFF files in Shake is a bit tricky because of the way Maya stores depth information… here’s a quick tutorial to get you started.
NoteThis tutorial is applicable on not only Maya’s IFF files but also on other image format files rendered out of other 3D applications. Example files are available for download below. Happy shaking!
- zCompExample.iff - Maya IIF image
- zCompositeIFF.shk - Shake script
32-bit floating point
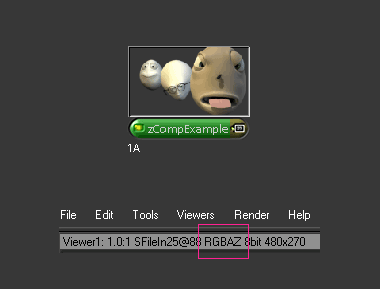
Render out your own IFF image using Maya’s batch renderer or use my example (download above) to experiment with. The file above was rendered with mental ray version 3.3.1 for Maya 6.
Load the IFF image or IFF sequence (containing an alpha channel and a Z channel) into Shake using the FileIn node. The channels of your image are listed in the top of the viewer (in this case RGBAZ).
Maya always renders the Z channel of IIF files in 32-bit floating point. Other 3D applications can output the Z channel in 8-bit which means that the Z channel is built up of a maximum of 256 shades of gray (2^8 = 256). In high end production this might not be enough to visualize the depth and in that case you can render in 16-bit (2^16 = 65 536 shades of gray) or 32-bit (2^32 = 4 294 967 296 shades of gray) to increase the resolution of the depth.
Convert to float space
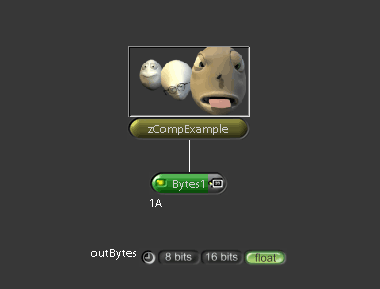
Our Z channel is already 32-bit, but the RGB and the alpha channels are just 8-bit. Create a Bytes node and put it to float space. This will change the bit-depth of your image to 32-bit floating point. Please note that this won’t affect the actual image, just the way it is described. Before, RGB and alpha information was described between 0-256 and we have now converted it into 0-1 where we can drive values above 1 and below 0.
Reorder to RGB
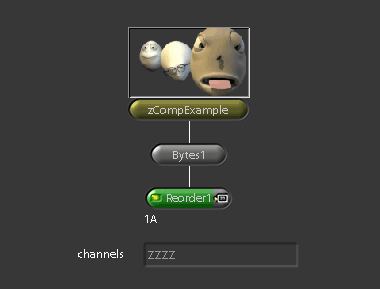
Now we will bring the Z channel into RGB so that we easily can perform RGB operations on it. Create a Reorder node and set its channels to zzzz.
Multiplying the Z channel using a mult node with local variable
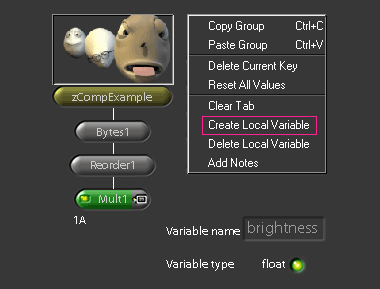
The grayscale depth image should be visible in RGB now, but since Maya stores depth information like this: -1/Z …it will not show up. To correct this we will need to multiply the Z channel with -1 (or in this case the RGB channel since we brought the Z channel into the RGB channels in the previous step). This is something we can do because we are currently in float space!
Create a Mult node, and inside of it, create a local variable by right-clicking in the Mult’s parameters tab. Let us name the local variable brightness and make it a float.
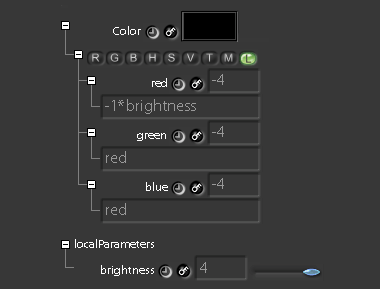
Next, expand the Mult’s color attributes twice until you see the red, green, blue attributes. Into the red attribute textfield type: -1*brightness
This will change the depth value data from -1/Z to Z. But only for the red channel. Type red into the green and the blue channel to make them inherit the value from the red channel. Now drag the brightness slider around to offset the depth information to a viewable range. Please note that you might have to exceed the slider’s max value quite a lot (depending on the size of your scene). For the IFF file provided at the top of this page, 4 seems to be a good value for the brightness.
Brighten the Z channel
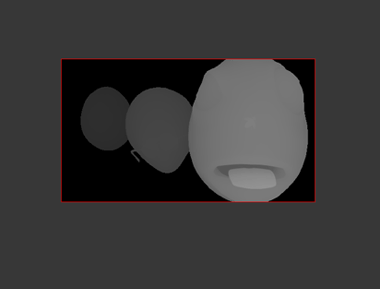
If you are using your own rendered file and keep getting an entirely black image, you need to increase the value of brightness. If your image is all white, you need to lower the value of brightness.
On a sidenote it is worth mentioning that there is a reason for why we have named the local variable brightness. Brightness is nothing more than a multiplier on the RGB channels …and that’s exactly what we have done here.
If you like, you can perform aditional RGB operations since all depth information is now in RGB space. Perhaps you want to use an Expand node and/or an Invert node here (to match other render passes). Try to not make the edges of objects in the Z channel anti-aliased as this would move the edges away from its object, depth wise.
If you used the IFF file in this tutorial, your RGB channel would now look like the image to the left.
Reorder back to Z
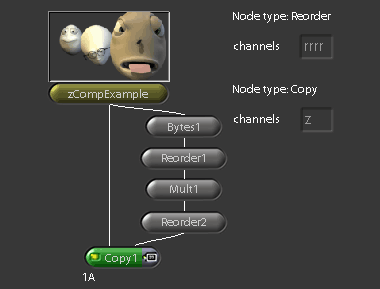
To transfer the new grayscale depth image to the original image’s Z channel, create a Reorder node (let’s call this Reorder2) and type rrrrr into its channels textfield. Then create a Copy node on its own branch directly under the FileIn node. Put z into the channel textfield of the Copy node. Connect the output from the Reorder2 node to the Copy node. This takes your original image and copies the Z channel from the Reorder2 node. You finally have a Z channel that Shake can do something useful with!
Create a macro
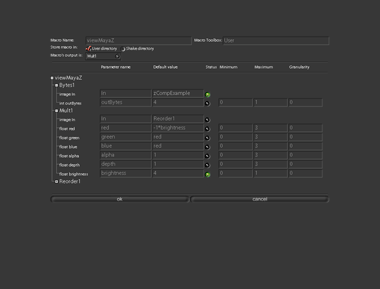
If you would like to make a “view Maya Z” macro, you can select the Bytes1, Reorder1 and Mult1 nodes and hit shift-m. This will bring up the create macro dialogue. Scroll down to the Mult1 and expand it. Here you can make the brightness slider visible in the macro by clicking the status icon next to it. Also, you can define a maximum value for the slider instead of 1. Change the macro name and you are ready to start Z-comping that little sucker!
Depth shader
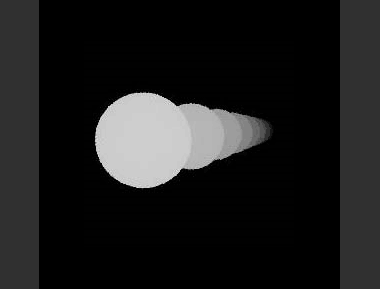
I should mention that when doing your Z composite, you can also use a depth shader to generate your Z image rather than rendering out the true Z image from within Maya. A depth shader is simply a shader that you assign onto all objects in your scene and with some scripting the output color of the shader will range from black to white (or vice versa). When using a depth shader you won’t always get the true Z depth because the renderer will generate an anti-aliased image (unless you specify otherwise 1). Having an anti-aliased Z depth could be both good and bad. It could be bad because wherever there is anti-aliasing in the image, effectively there is also a change in Z information. However this might not always be such a bad thing after all since the anti-aliasing itself works as a kind of alpha or Z coverage if you will. A shader that works exactly like this is available for download at highend3d.com in the Maya/shaders section
If you set Mental Ray’s anti-alias settings to 0 0, i.e. “Min Sample Level 0” and “Max Sample Level 0” then Mental Ray will cast exactly 1 ray per pixel. This will result in an image which is completely without any anti-aliasing and the depth information is totally exact on a per pixel level. Thanks to Andreas Bauer for pointing this out to me! ↩︎